Quick Start Tutorial
Learn the ropes of the Apicbase API!
👨💻 Introduction
This tutorial is a practical guide for the basic concepts of the Apicbase API, including authorization, sending, querying and filtering data. You will learn how to create your first recipe and how to retrieve that recipe's details using API requests.
Whether you're an API veteran or just getting started, at the end of this tutorial you'll be ready to start developing your own solutions with Apicbase.
👣 Prerequisites
For this guide, we assume that you already have access to an Apicbase account and that the API module is enabled on your library. If it isn't, some of the options in this tutorial will not be visible to you. Get in touch with your sales contact to acquire this module.
Download and install Postman
Postman is a platform for building and using APIs that makes it easy to make and validate requests. Download and install Postman before continuing.
Import the collection into Postman
After completing your Postman setup, import the Quick Start collection. Click here to add the Quick Start collection to Postman.
💻 Create an application
The client credentials (Client ID + Client Secret) identify your application when connecting to the API. Every API user, external partners and library owners alike, must connect using a set of client credentials.
External partners can be granted a special set of credentials that allows them to authenticate into multiple libraries, but for the purposes of this tutorial, they should also generate their own credentials from the sandbox library.
- From your dashboard, click the cog icon in the top right and go to Library Settings.
- Click the Api Settings tab from the menu on the left side of the screen. You should find this page:
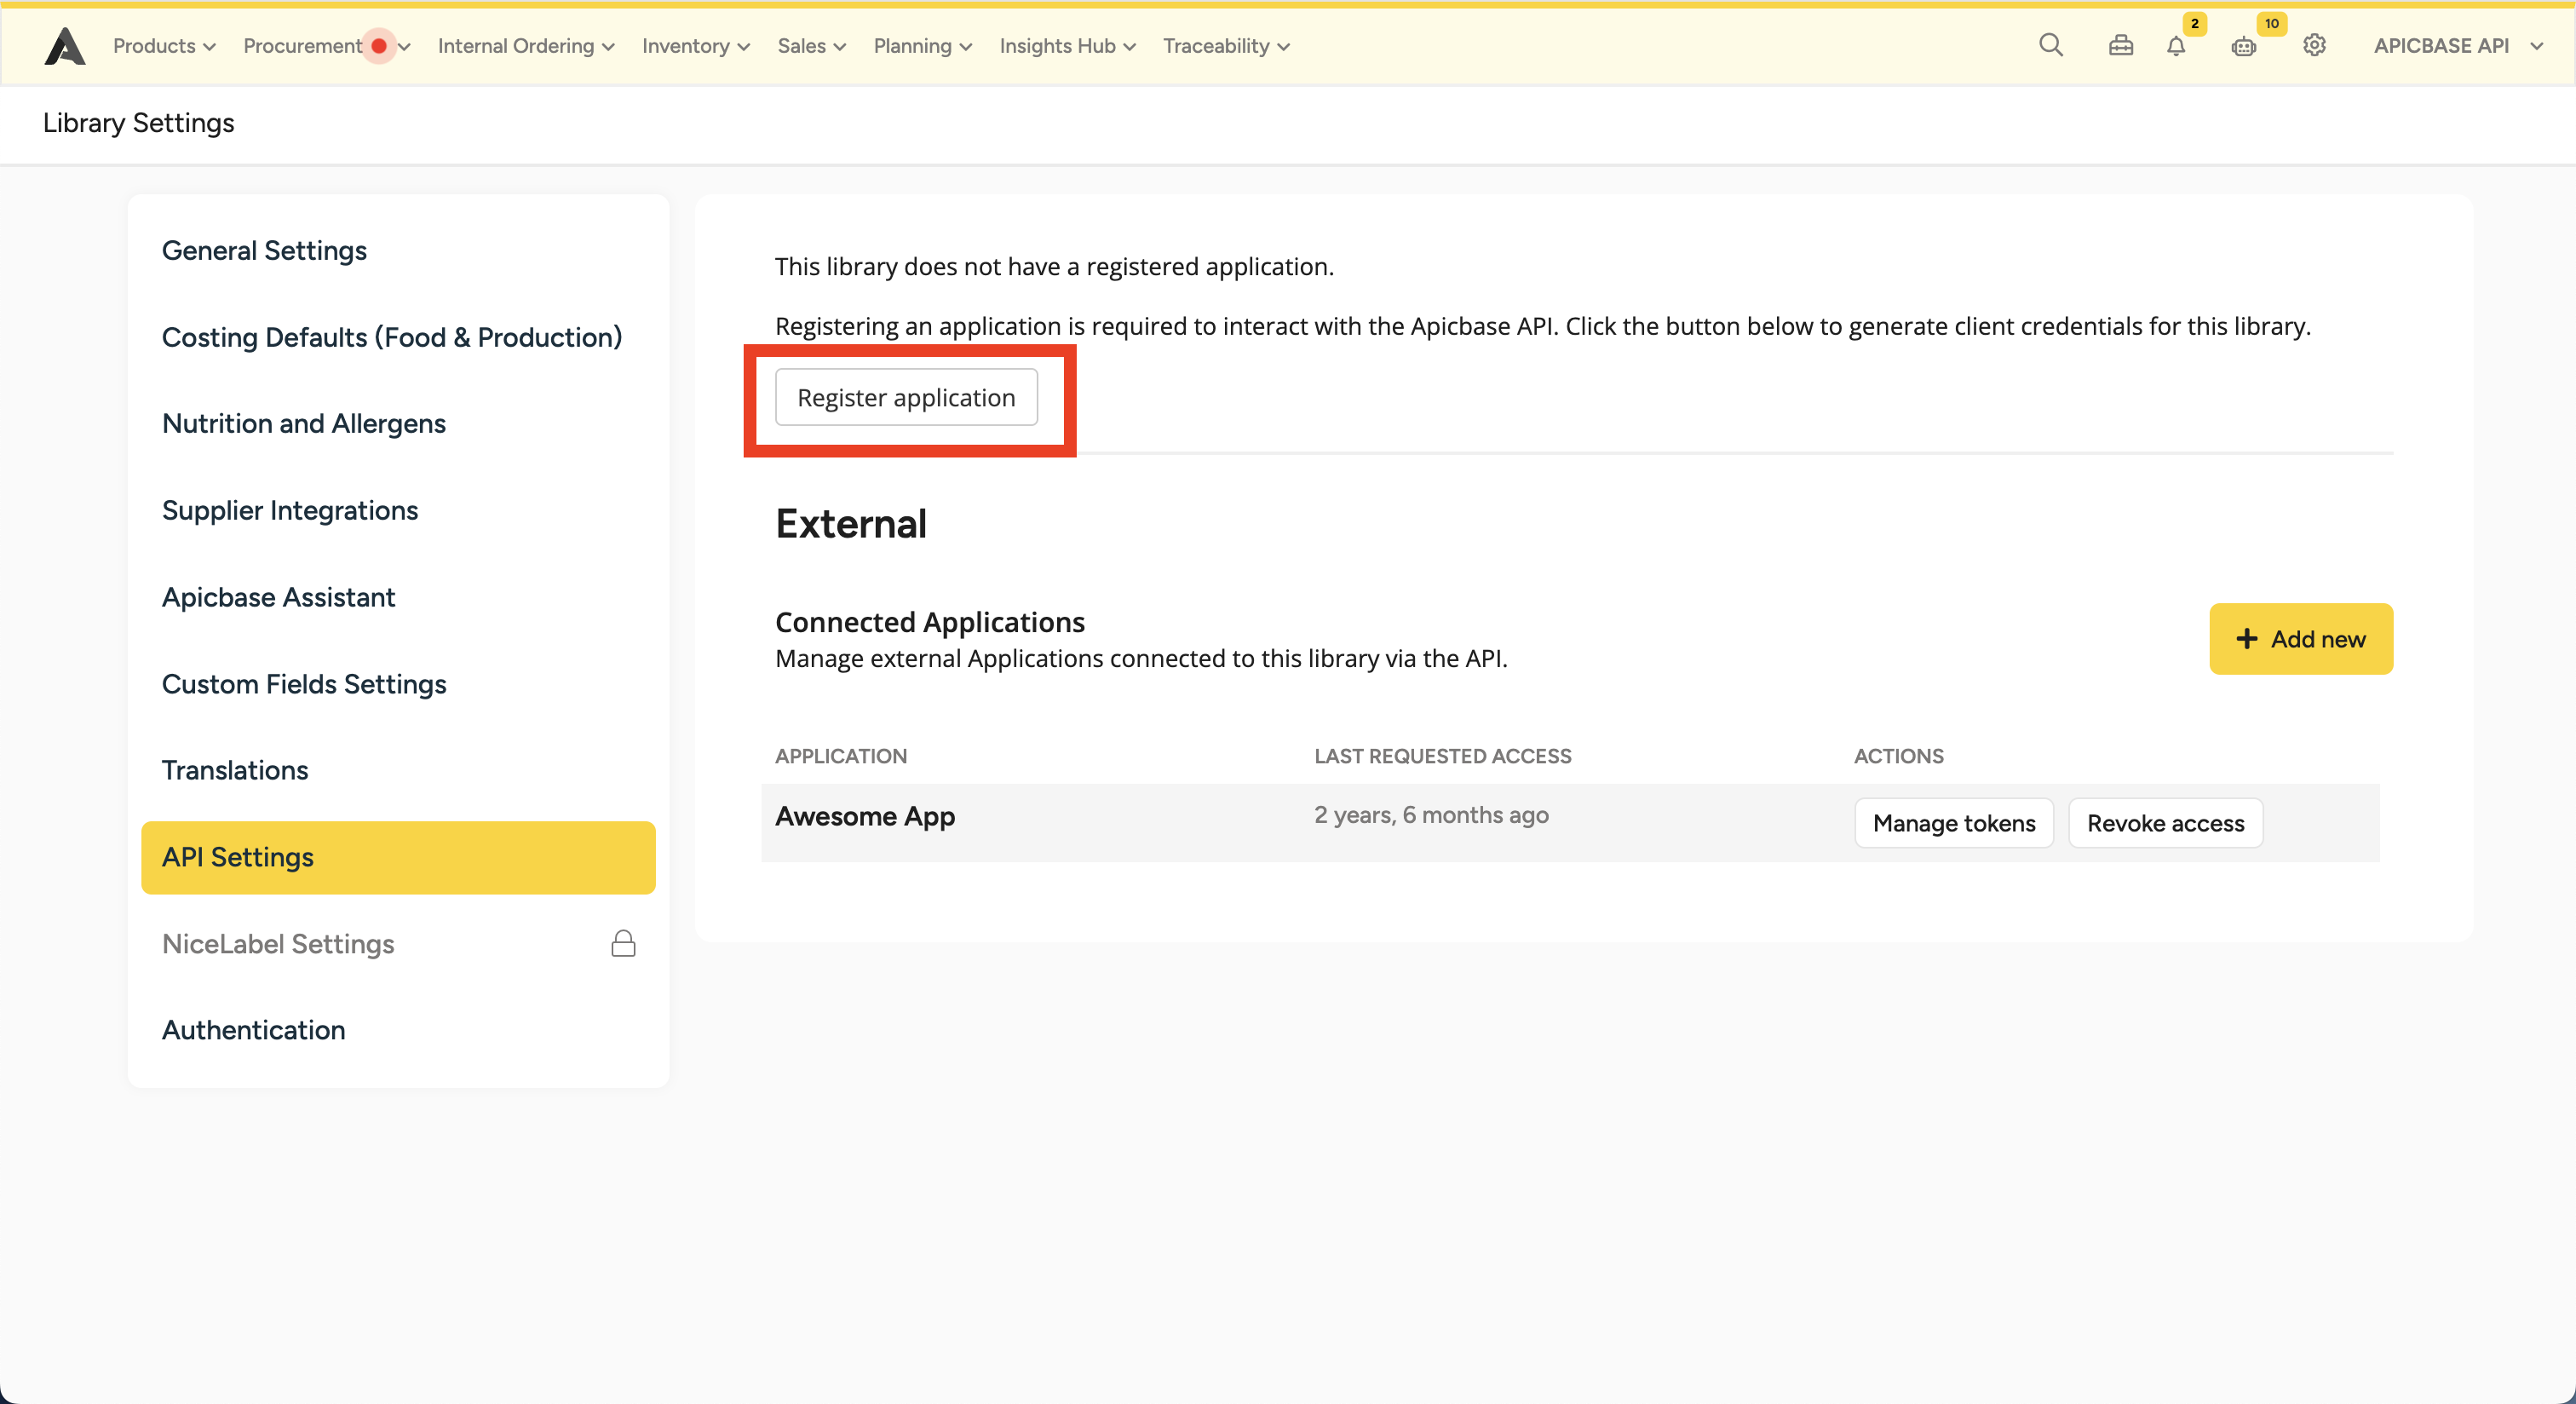
- Click Register application. Your library's client credentials will be shown in the same page:
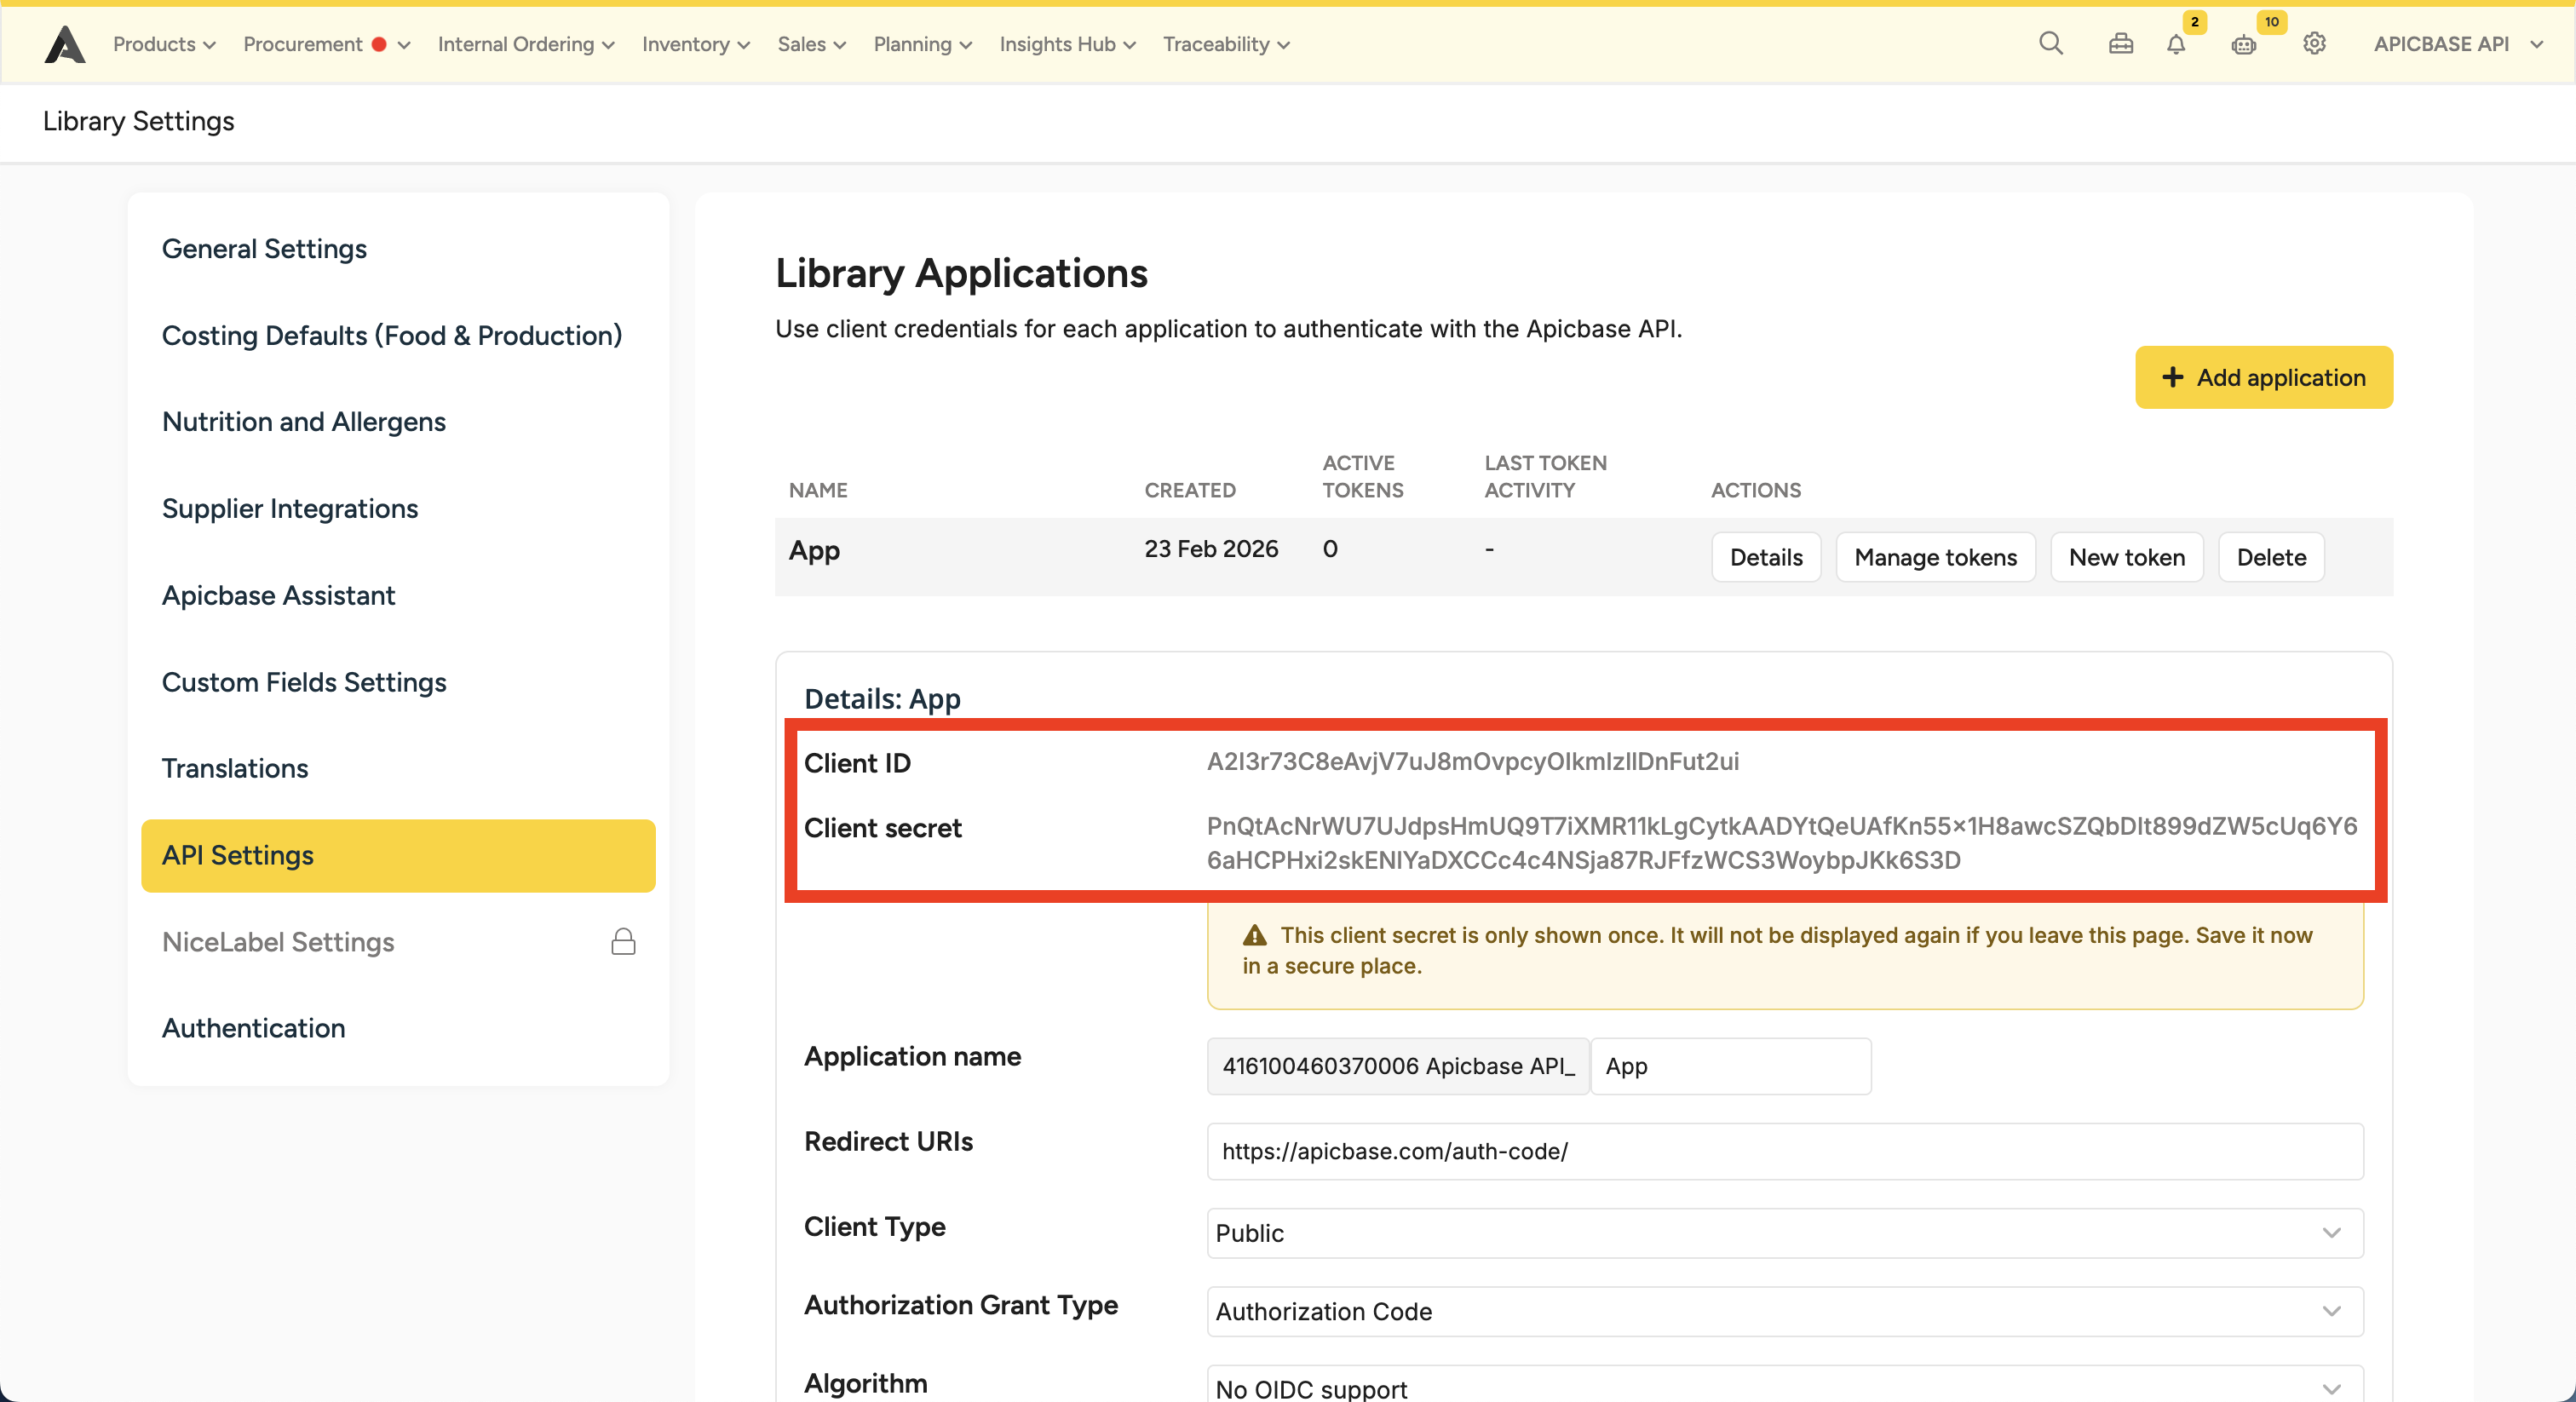
The client secret is only shown once.Save it before clicking away from the API settings tab. If it's lost, you will need to create another application.
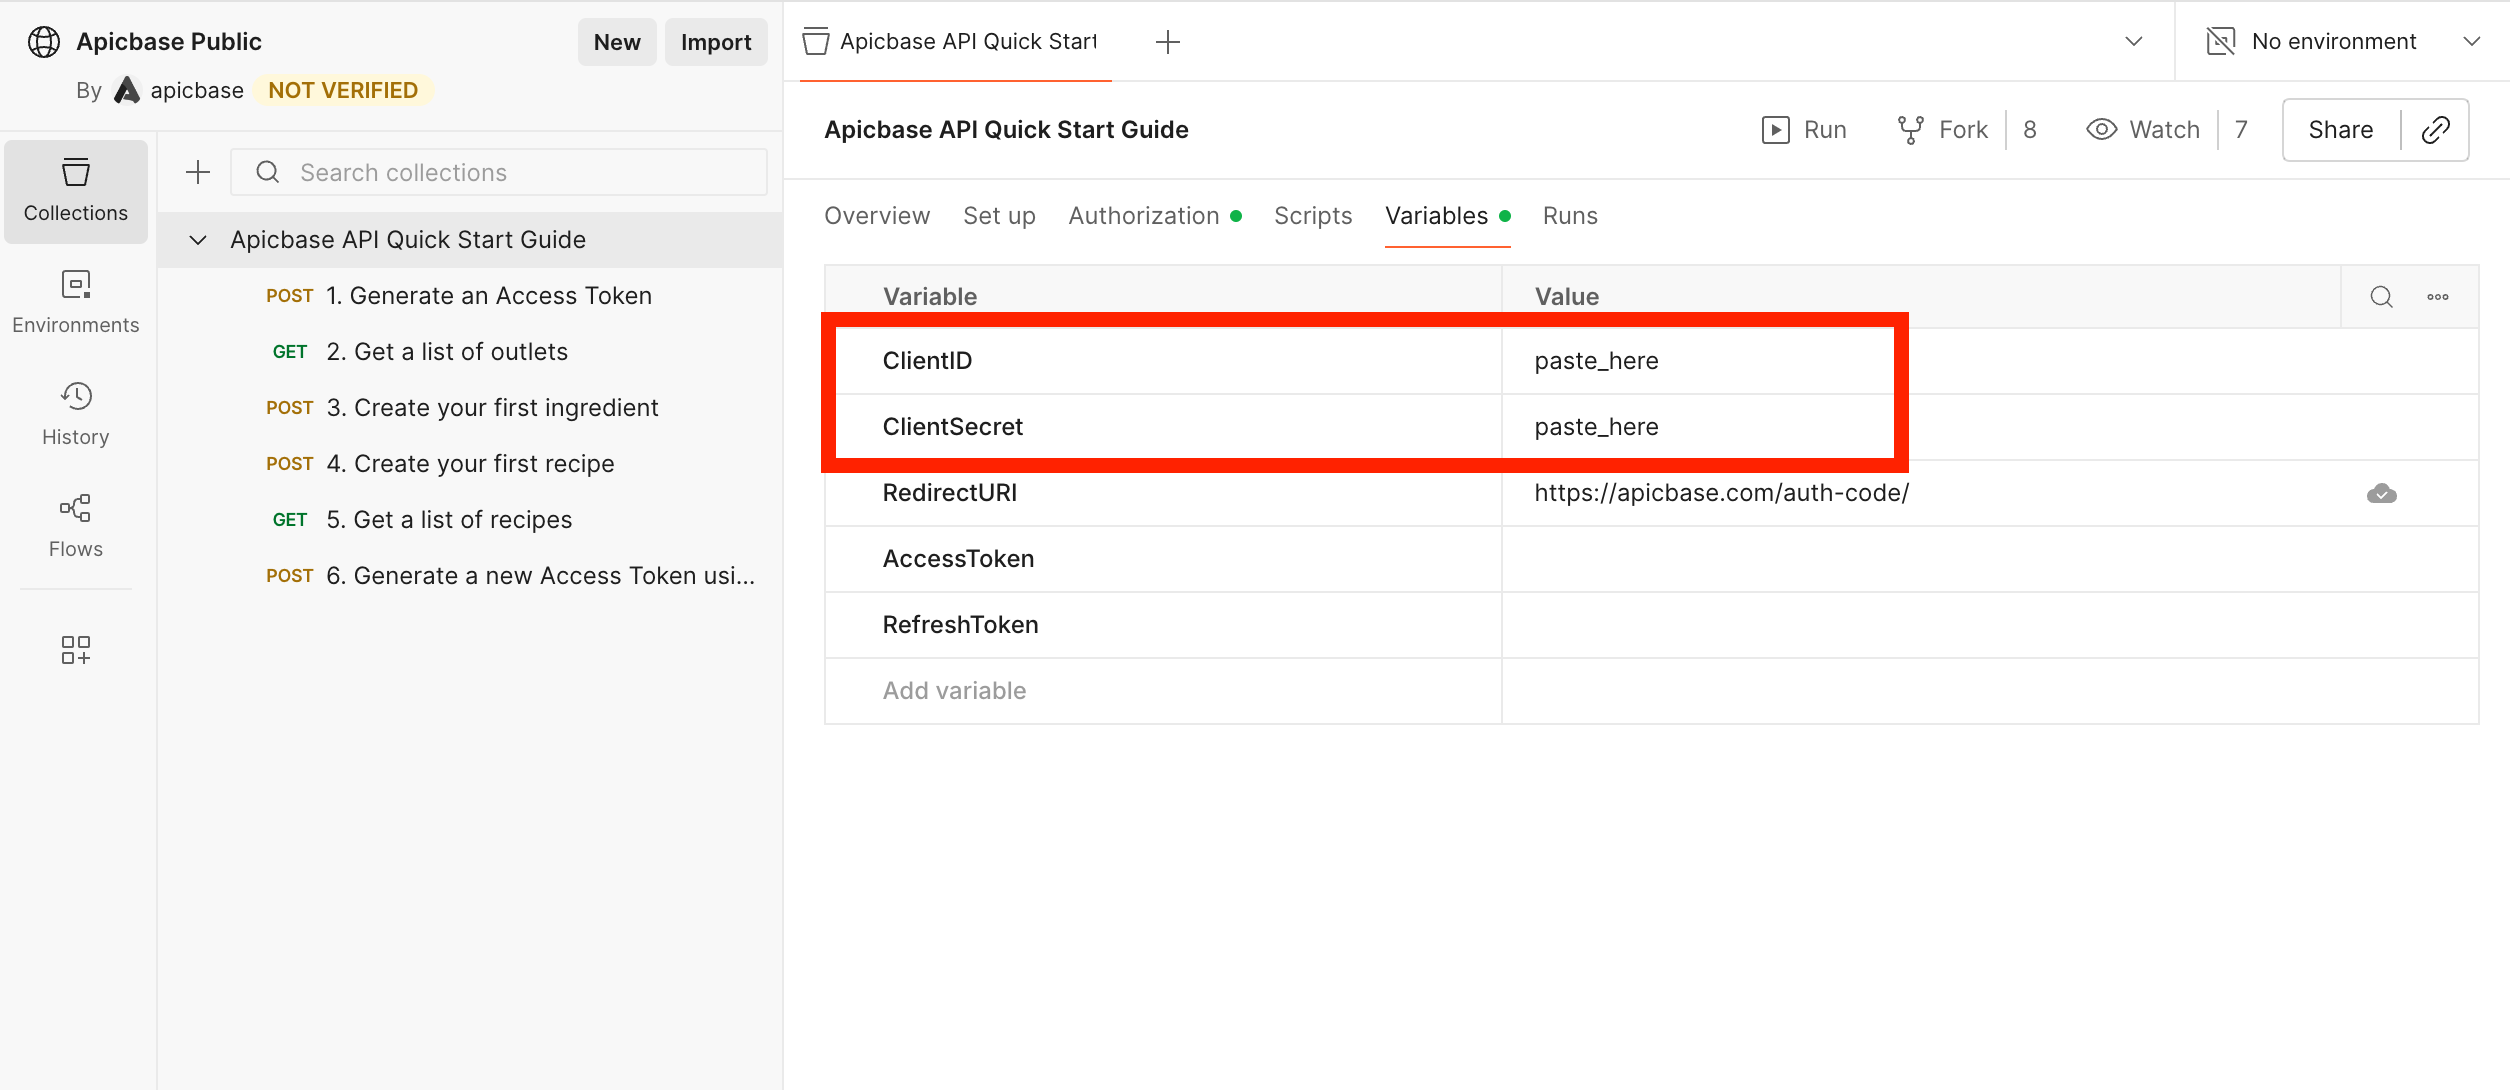
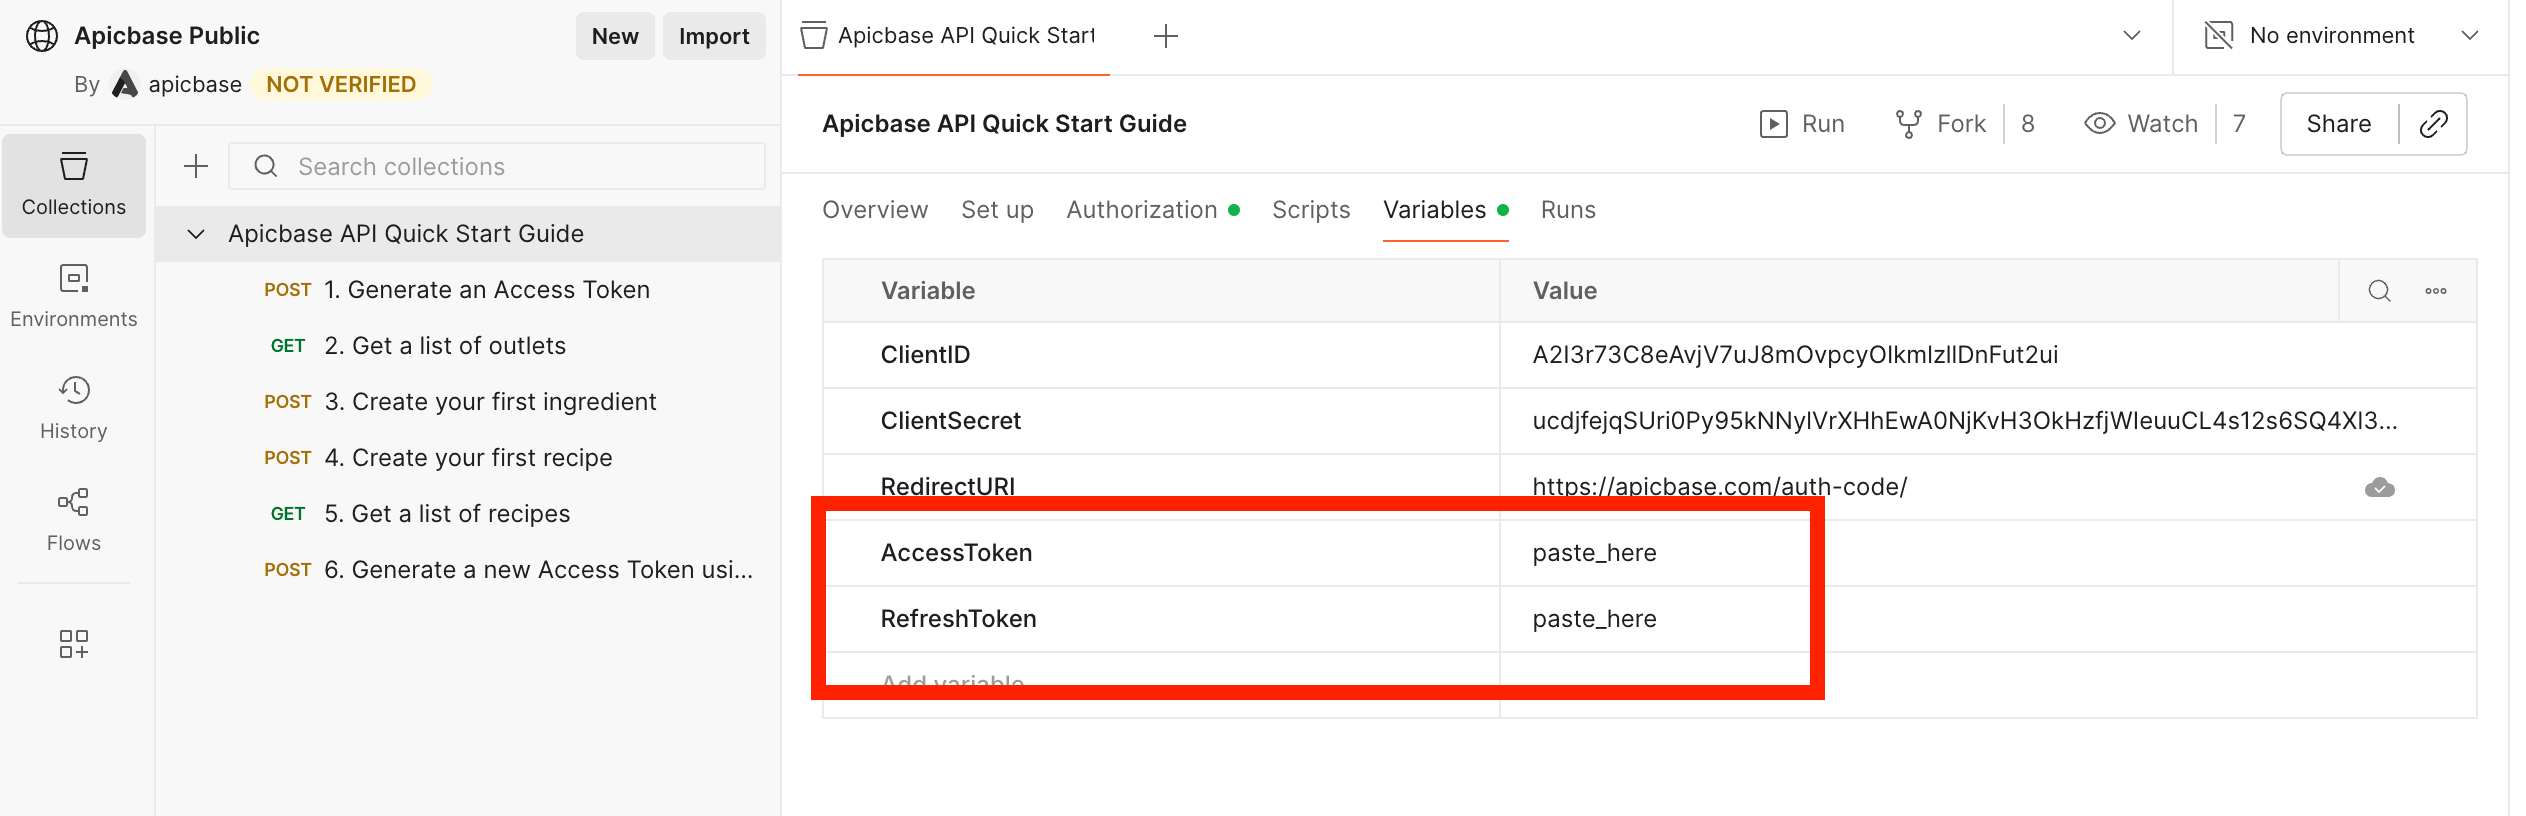
- Head over to the imported Postman collection. Find the collection's Variables tab, paste the Client ID and the Client Secret into the indicated fields and save. Do not forget to save!
🔑 Generate a token
Building an integration where users authorize your app with their own credentials?This guide covers token generation from the Apicbase UI. If you're building an integration where users will authorize with their own Apicbase accounts, see the Authentication guide for the complete OAuth flow.
Before your application can make requests, it needs an access token.
Once you've created your application:
-
In the Library Applications table, find your application and click New token.
-
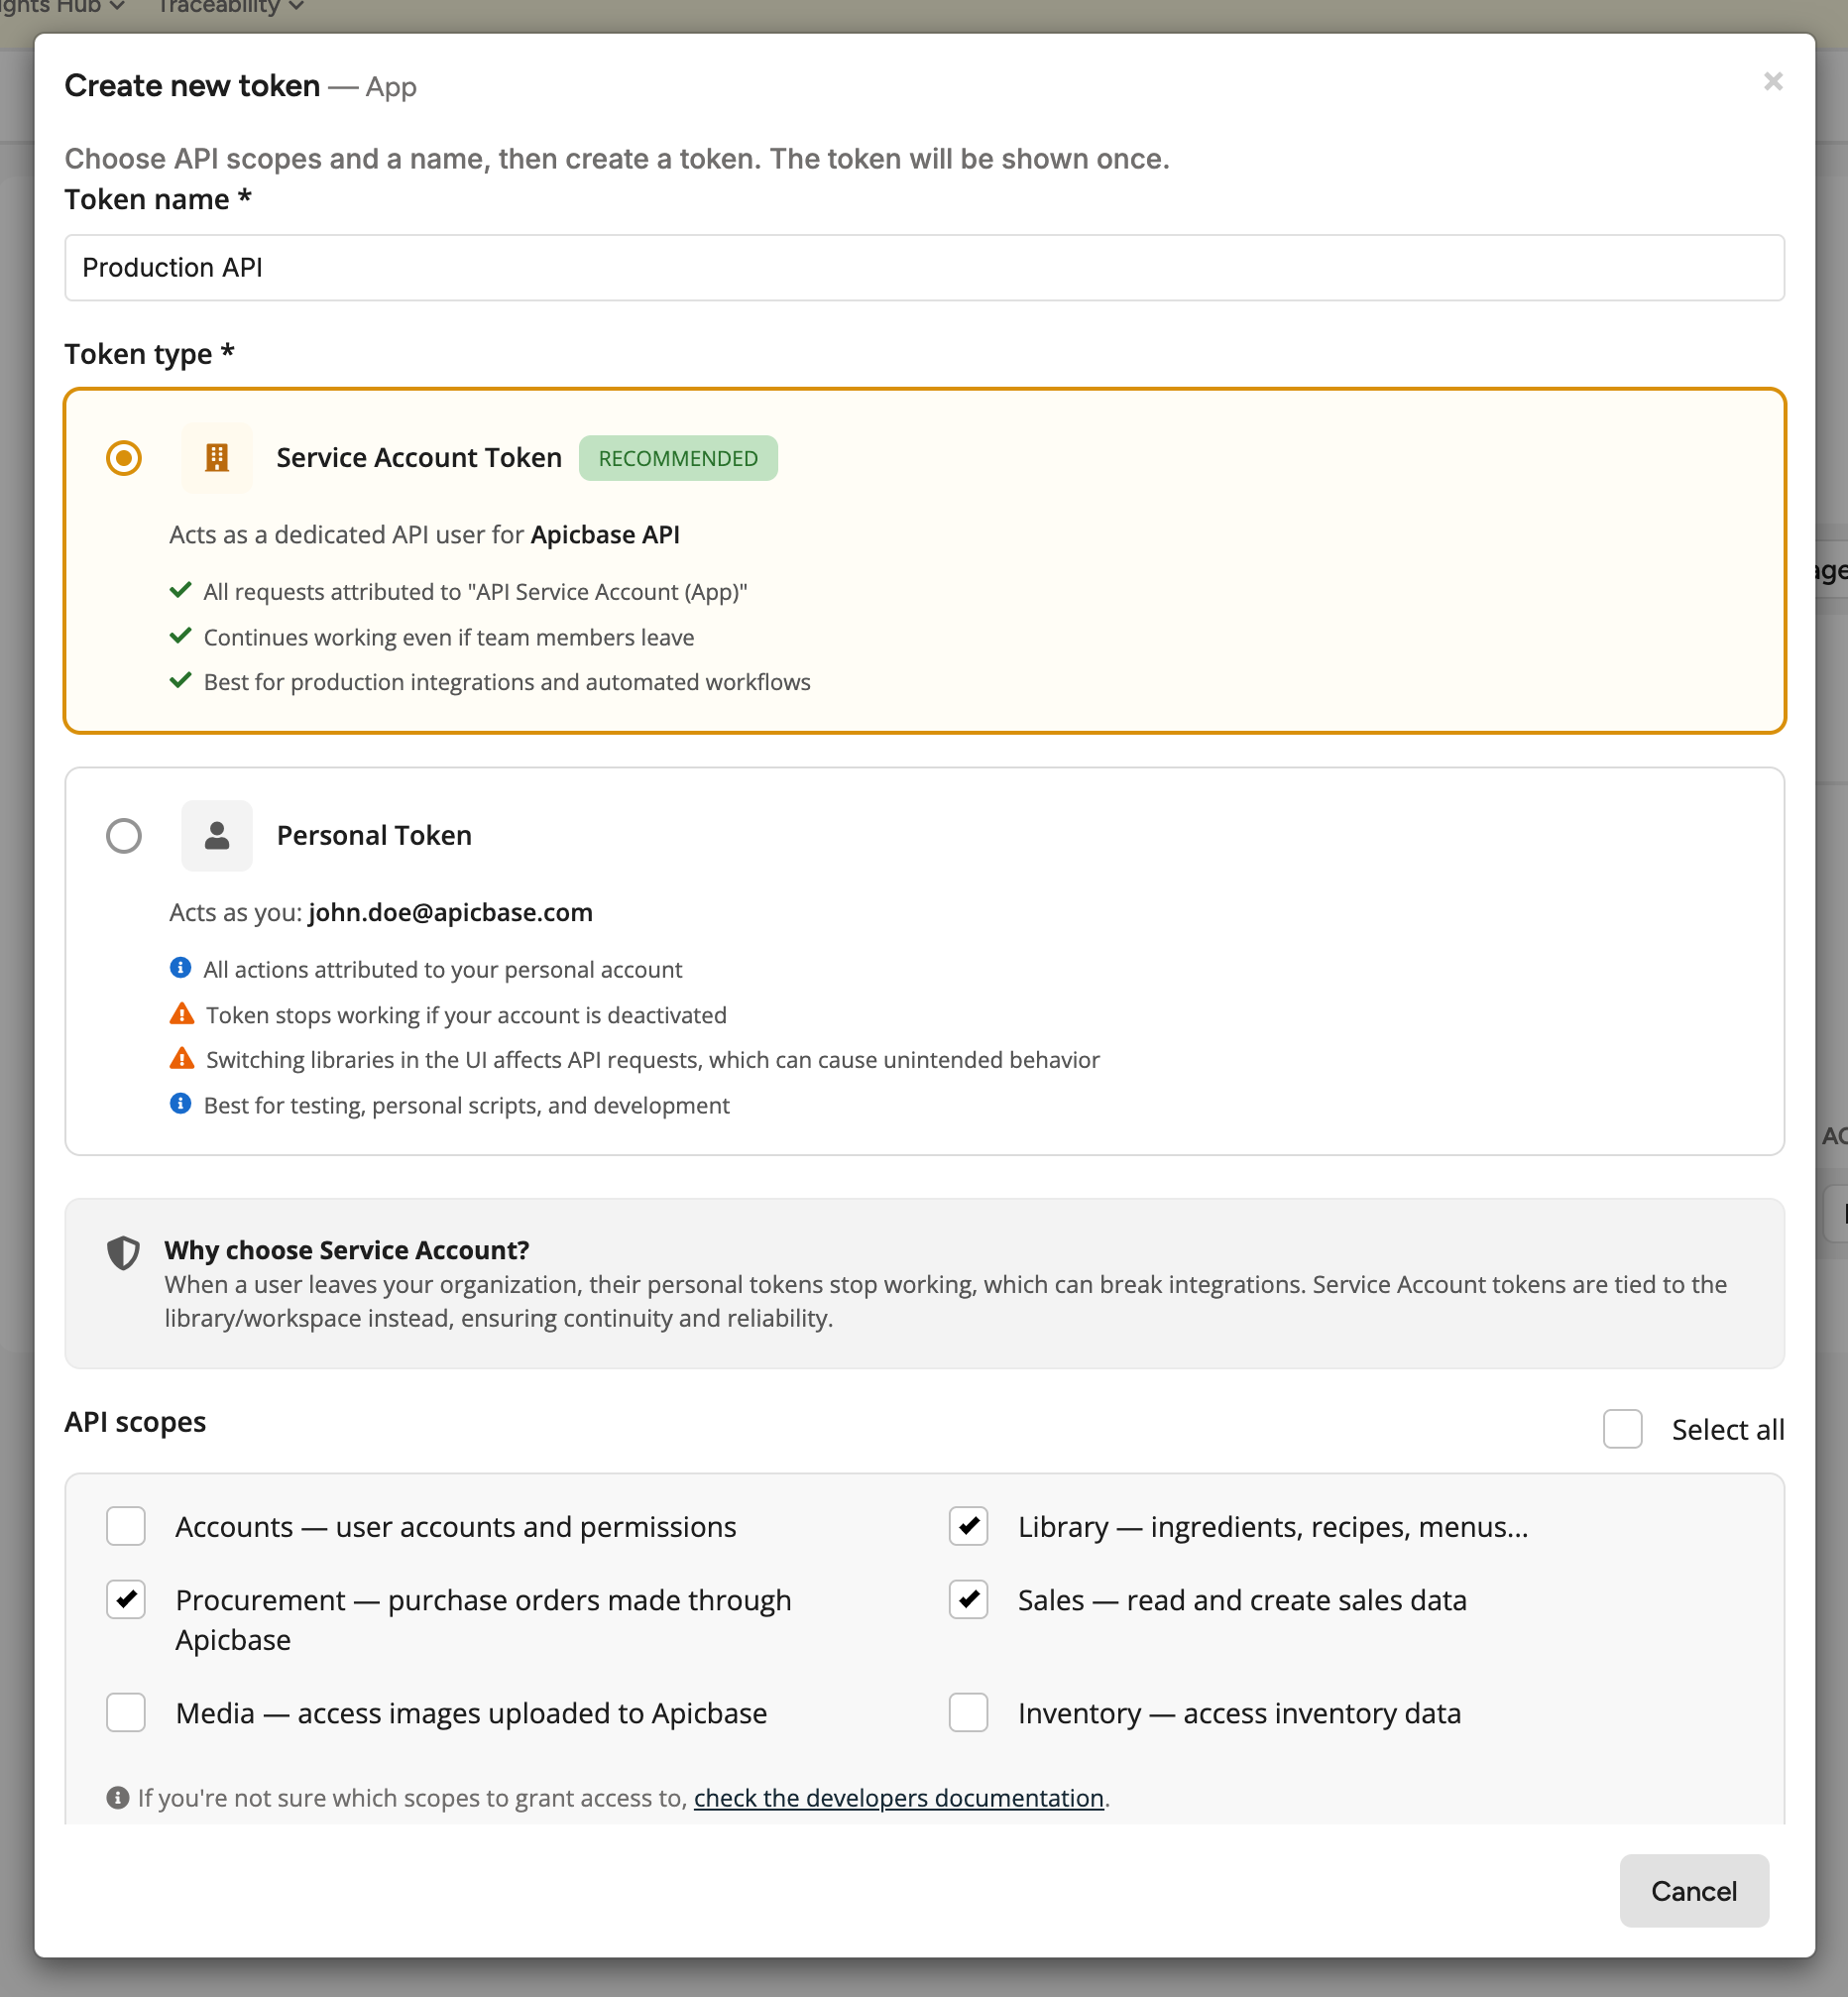
Give the token a name (e.g. "Production API") to help identify it later.
-
Select a token type:
- Service Account Token (recommended) — acts as a dedicated API user for your library. Requests are attributed to the service account rather than any individual. Use this for production integrations and automated workflows.
- Personal Token — acts as you (the logged-in user). Tied to your account, so the token stops working if your account is deactivated. Use this only for specific workflows that require this mode.
-
Select the API scopes the token should have access to. Grant only the scopes your integration actually needs. If you're unsure, see the scopes reference.
-
Click Create token.
Your Access Token and Refresh Token will be displayed here now. Copy both into your Postman collection's Variables tab, in the AccessToken and RefreshToken fields respectively, and save.
💾 Manipulating data
Now we have everything we need to start making requests.
Let's create our very first recipe via the API:
Get a list of outlets
Open the second request in the collection "1. Get a list of outlets" and click Send.
This is a basic GET request that doesn't require any parameters. The server will reply with a JSON-formatted list of outlets in the library that your user is logged into. Take a moment to understand the structure of this response and the information in it.
Create an ingredient
Open the third request in the collection "2. Create your first ingredient" and open the "Body" tab of the request.
This is a POST endpoint that takes the definition of an ingredient in the request body as a JSON-serialized object. We're about to create an ingredient called "Fresh Oranges" with internal ID "ORANGE1000" and a short description in the first outlet from our list.
{
"name": "Fresh Oranges",
"internal_uid": "ORANGE1000",
"description": "High quality, certified bio oranges.",
"category": "Fruit",
"subcategory": "Citrus",
"article_type": "Food",
"outlets": ["{{OutletId}}"]
}
Click Send.
The server will reply with 200 OK if the response was successful. You can navigate to the ingredient list page to see the newly created ingredient in your library.
Create a recipe
Open the fourth request in the collection "3. Create your first recipe" and open the "Body" tab.
This second POST endpoint works almost the same way as the previous one. We will create a recipe for Orange Juice that takes a single ingredient - the Fresh Oranges from the previous step. Take a moment to understand the JSON structure of the payload:
{
"name": "Orange Juice",
"uid": "OJ10001",
"description": "Freshly pressed, made from the freshest oranges.",
"persons": 2,
"recipe_stage": "complete",
"recipe_type": "drinks",
"season": "summer",
"difficulty": 1,
"target_profit_margin": 10,
"vat": 12,
"sell_price": 3.50,
"net_volume": "500",
"net_volume_unit": "ml",
"ingredients": [
  {
    "ingredient": "{{IngredientId}}",
    "waste_percentage": 0.4,
    "quantity": 0.5,
    "unit": "kg"
  }
],
"steps": [
  {"description": "Put the oranges in the juicer."},
  {"description": "Pour it all in a tall glass. Yum!"}
],
"outlets": ["{{OutletId}}"]
}
Recipes are complex structures and the possibilities here are many - make sure to check out the reference guides after you complete this tutorial to get an idea for just how much information you could include in this request!
For now, let's hit Send. The server should reply with a 200 OK response. Find your recipe in the recipe list page and assert that it looks correct.
Get a list of recipes
Let's try and retrieve the recipe that we just created with the recipe list endpoint. Open the fifth request in the collection "4. Get a list of recipes".
This endpoint accepts optional filters as query params. We'll filter on the UID field to try and find the recipe that we just created. This is done by appending ?uid=OJ10001 to the URL.
Click Send. The server should send back a list with a single element: the Orange Juice recipe. Take a look at the returned object: this is a simplified response. You can also make a request to the URL indicated in this object's url attribute to get the complete information from the Recipe detail endpoint.
🔁 Refreshing your tokens
The access token expires one week after it's been created, for security reasons. The server will block attempts to access the API with tokens older than one week with a 401 Unauthorized response. Therefore, this token must be periodically refreshed.
You'll need to get a new token, but you won't need to log in again for that, that's what OAuth is all about. In the first step we obtained a set of tokens, an access token that we've been using to make requests and a refresh token that we're going to use now.
Open the last request in the collection "5. Generate a new Access Token using the Refresh Token". In the Body tab you can see the mandatory contents of the payload:
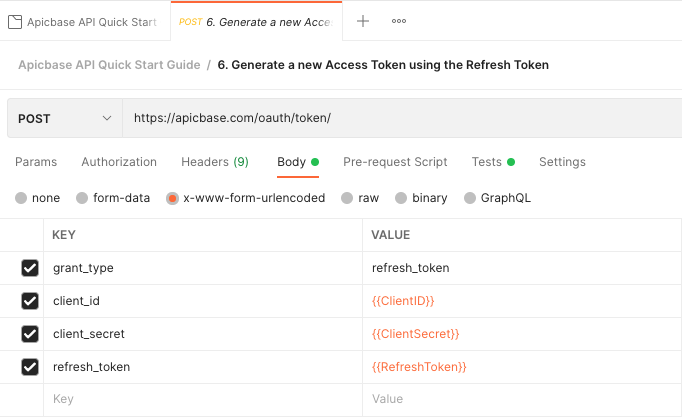
Click Send.
The server will reply with a new set of tokens. Notice how both the access token and refresh token are different. This is a brand new set. The access token is valid for another week starting from now, and the new refresh token should be used to refresh it - the old refresh token is now used up and invalid.
You can't reuse refresh tokens!A common mistake is to attempt to use a refresh token that has already been used. When this happens, you will get an "invalid grant" error (go ahead and try it).
After you've used a refresh token, copy the new token that is also in the success response and use it for the subsequent request, and discard the old token.
When you're developing for the Apicbase API, your script has to do this automatically.
💭 Further questions
If you still have questions after following this tutorial, check out the Q&A section on the Authentication guide. It provides answers to the most common questions that come up when authenticating to the Apicbase API for the first time.